
After you’ve just got your hands on Tuya Smart Camera, the next step is to set it up.
So if you’re wondering, “How to set up Tuya Smart Camera?” follow this easy-peasy 10-step guide.
This article will walk you through every step to set up your Tuya Smart Camera. From setting it up to installing the Tuya smart cam, you’ll find everything covered in this post.
Plus, if you do it right, it shouldn’t take you more than 5 minutes!
You just need five things to get started with it:
1. Tuya Smart Camera
2. Smartphone (Android or iPhone)
3. Tuya App
4. Power or a cloud server
5. And a stable internet connection
With these things sorted out, you can start setting it up following this guide. To make it quick, I’ve simplified the Tuya Smart Camera setup guide in a few steps. So let’s dive in!
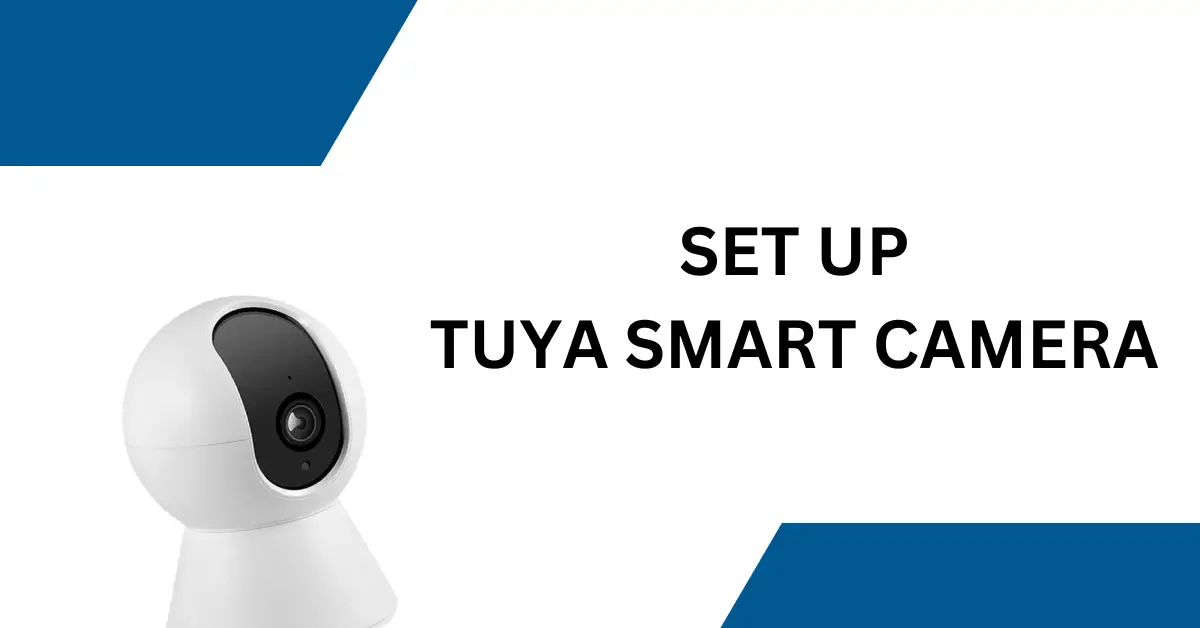
Step 1: Unbox your Tuya Smart Camera
Of course, I know you must’ve already done this step. But you have to make sure that you’ve got all the necessary parts to set up Tuya Smart Camera.
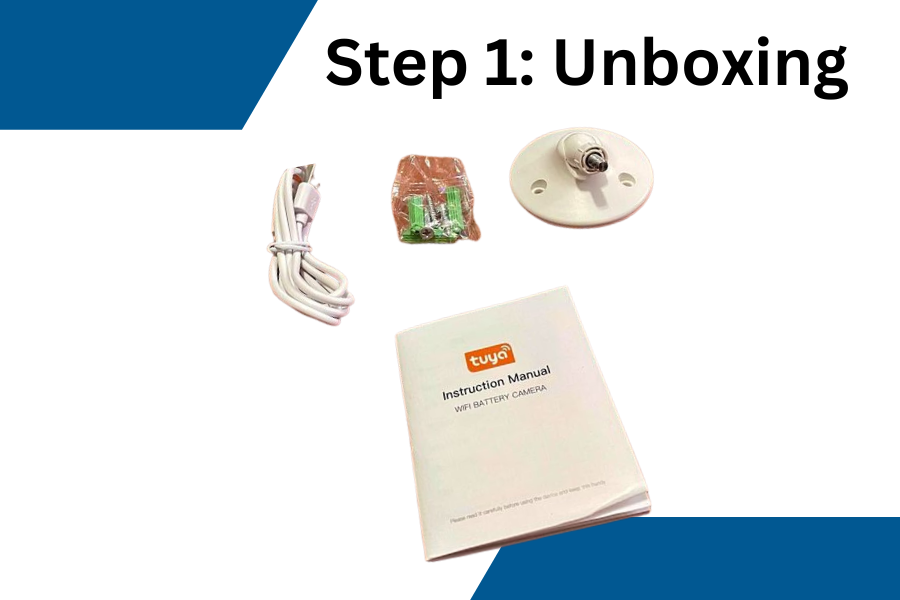
Step 2: Download the Tuya Smart App
The next step is to download the Tuya App on your smartphone.
Tuya app for Android or Tuya app for ios
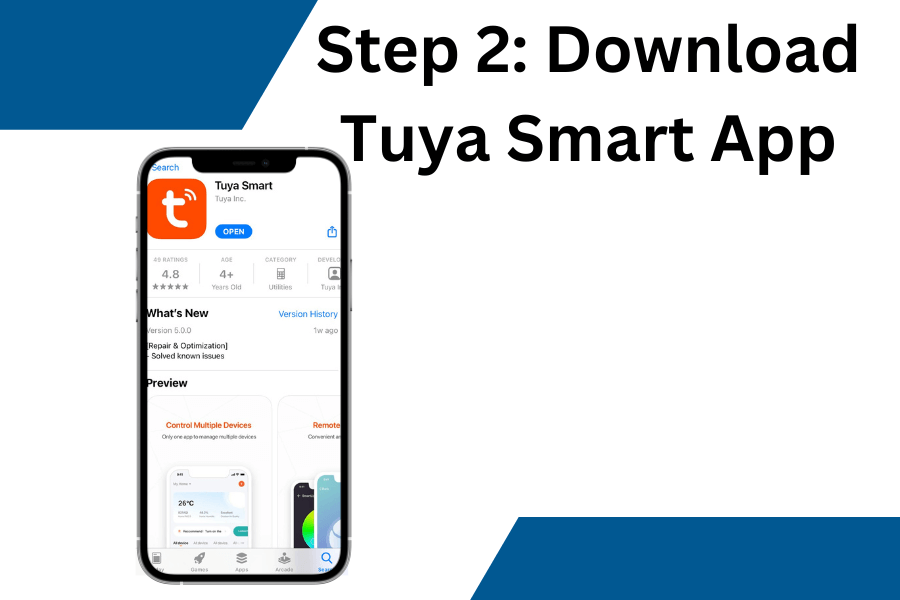
Step 3: Power on the Tuya Smart Camera
Plug the Tuya Smart Camera using its adapter to power it on. You would see the camera’s LED flash, indicating that it’s ready to set up!
Step 4: Launch the Tuya Smart app

After you’ve opened the app, you are required to make an account. So make an account if you don’t have one already.
Step 5: Tap on the “+” Button

Click the “+” or hit the “Add Device” button to add your Tuya Smart Camera.
Step 6: Select Camera & Lock from the device category
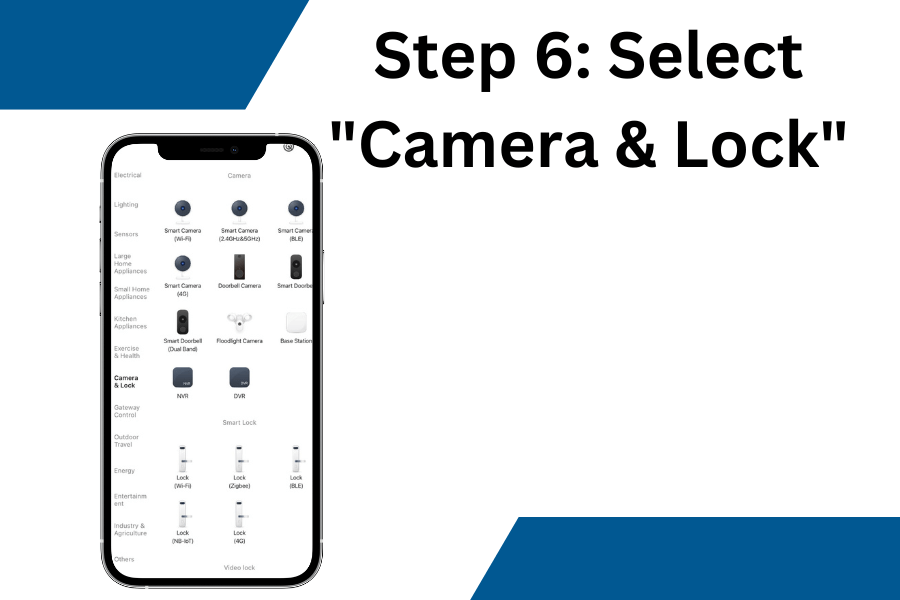
There are a couple of device options in the category. But you should select “Camera & Lock” from this category.
Step 7: Pick your Camera type
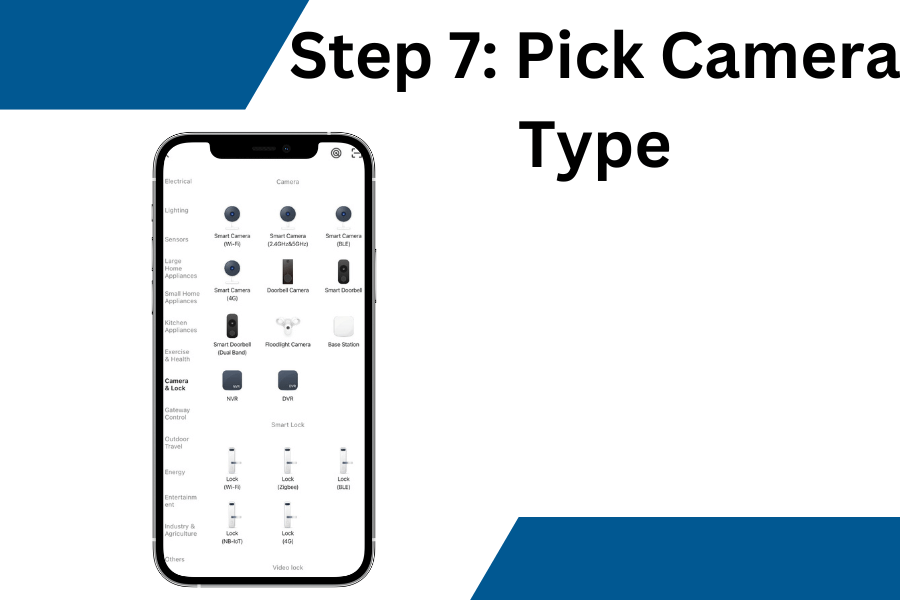
Pick the camera type that you’ve got from any of the options. It’s most likely the Smart Camera (Wi-Fi) if you are using a 2.4 GHz network on your router. But if you’ve got the model of Tuya Smart Camera that supports 5 GHz, you can select “Smart Camera (2.4 Ghz& 5 GHz.)
Step 8: Reset the device
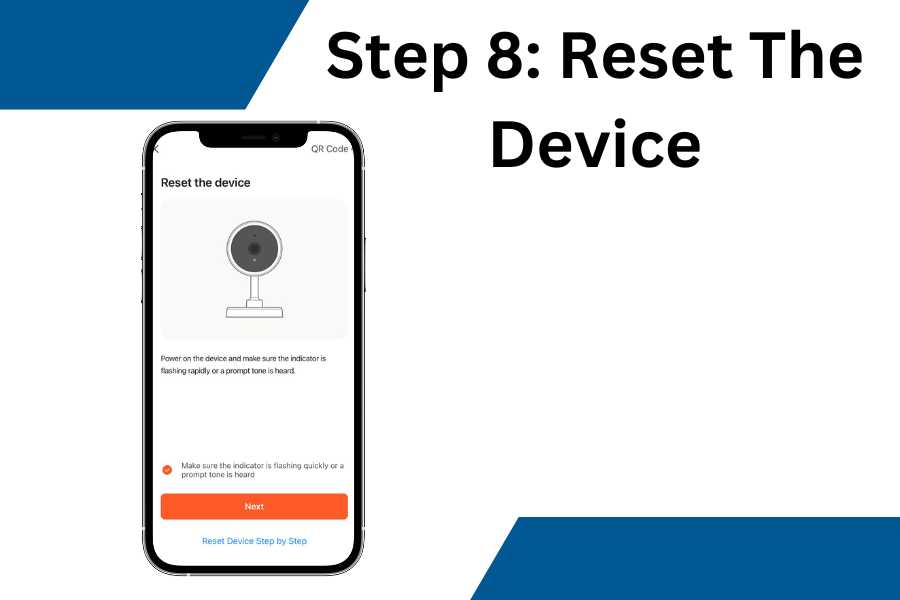
After you select the smart camera, you would be prompted to reset the device. Click on “Reset Device Step By Step” to proceed to the next step. Or, reset your Tuya Smart Camera using my simple guide if you are still confused.
Step 9: Scan the QR Code
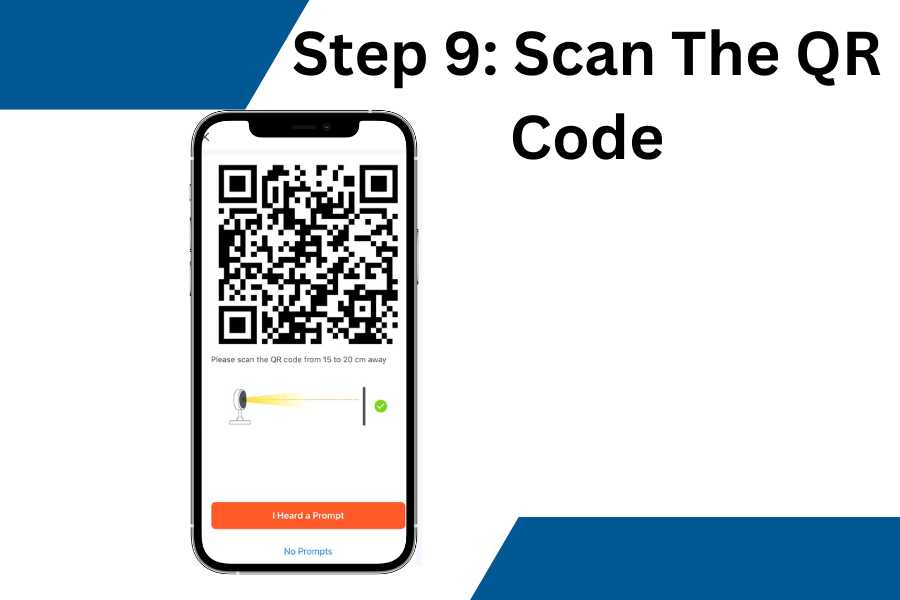
On your smartphone’s screen, you’ll see the QR code. Scan this QR code by showing the smartphone’s screen in front of your Tuya Smart Camera’s front sensor. You’ll hear the beep sound with a blinking LED – and a final prompt or a response from your smart camera!
Click the “I heard the prompt” and wait for seconds for it to complete the scan.
Now test the camera by accessing the live video stream on your Tuya Smart app.
Step 10: Install the Tuya Smart Camera
After you’ve successfully added the smart camera to the app, it’s time to mount it. So if you aren’t sure how to install Tuya Smart Camera, fret not!
Just find a suitable place in your home where you want to mount the camera. For example, install it on a wall or ceiling.
Pro Tip: I recommend placing the camera at a proper height. So that you can have a good view of the area that you want to specifically monitor.
Things to keep in mind during setup
When setting up or installing your Tuya Smart Camera, there are a couple of things to keep in mind. When you’ve got these things sorted out, you can easily use the smart camera without any issues.
Wi-Fi Network – The Tuya Smart Camera supports 2.4GHz Wi-Fi networks, so make sure your smartphone or tablet is connected to a compatible network before setting up the camera.
But if your model supports a 5 GHz or 5G router, make sure you select the Smart Camera (2.4GHz&5GHz).
Wi-Fi Signal Strength – Like other smart devices, Tuya Smart Camera needs a strong and stable Wi-Fi signal to function properly. So make sure the camera is within range of your Wi-Fi router and avoid placing it in areas with poor Wi-Fi coverage.
During setup, keep the router near your smartphone so that the device can connect easily.
Power Source – You’d already know that Tuya Smart Camera needs to be plugged into an electrical outlet to work. And that’s why you get a power adapter with it, right? You should make sure to connect it to the outlet within reach of the camera’s power cord.
But if you’ve got the battery-powered Tuya Smart Camera, you need not worry much. Just charge it when required!
Camera Placement – As I said before, camera placement is important. So always find a suitable location to mount the camera and install it there. Just make sure not to place the camera in direct sunlight or areas with extreme temperatures. It can heat up or damage the camera.
Mounting Surface – You get some additional tools with the camera like mounting hardware for a reason. You should use this mounting equipment (screws, for example) to install or attach the camera to your preferred location. You’ve to ensure that the mounting location you choose is strong enough.
After all, you don’t want the camera to fall off. So be careful when you install it!
Camera Angle – Better angle means better monitoring. So adjust the camera angle, so you can have good coverage of the area. Make sure the camera is not pointing at areas that could compromise privacy, such as windows or other people’s property.
The Bottom Line
Hopefully, after going through this 10-step guide with pictures, you’ll be able to set up the Tuya Smart Camera easily. I’ve made the setup process as simple as possible for every smart homeowner. So you can use the camera right after you set it up – within minutes!